
Put a small static website online from your iPhone using Cloudflare's folder upload. Your agent can prepare the files; Safari and the Files app handle the upload.
Tested September 8, 2026: Devin reported completing this workflow on an iPhone using ChatGPT, Files, Safari, and an existing Cloudflare account. You can ask another chat app or agent to produce the same files. This test did not cover choosing between multiple Cloudflare accounts.
Use your existing static app, or ask your agent for a small example as a downloadable ZIP:
Make a small static website I can upload to Cloudflare from my iPhone.
Use HTML, CSS, and browser JavaScript. Package it as a downloadable ZIP
with index.html at the root of the extracted folder, alongside any CSS
and JavaScript files. Use relative links between the files.

Include a Say Hello button, a Reset button, and Size and Radius sliders
so I can check the deployed page's behavior. Explain what each control
should do and what Reset restores.

This is a static folder upload. It must work without a terminal, IDE,
Git, Wrangler, server-side runtime code, or build configuration.
Save the ZIP to the Files app. Tap it there to extract a folder. Keep that folder somewhere you can find again when Safari opens the file picker. If your agent supplies individual files, save them together in one folder with index.html directly inside it. The uploaded folder contains ready-to-serve website files, rather than source that still needs a build step.
Tap a screenshot to view it full size; use Back to return.
1. Open Workers & Pages
In Safari, sign in to Cloudflare and open Workers & Pages (opens in a new tab). Tap Create application.
The screenshots begin with an existing account already selected. If Cloudflare asks you to choose an account, select the one you intend to use before continuing; that selection screen was outside this test.
2. Choose the static upload
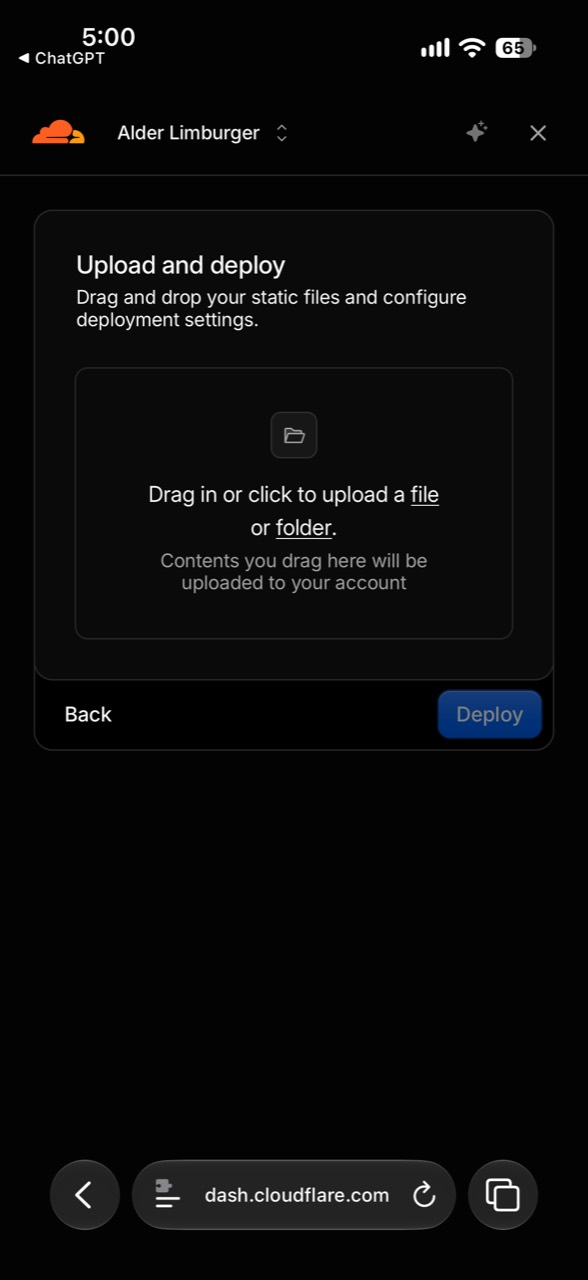
On Make something new, tap Upload your static files. The next screen is Upload and deploy. Tap the folder link inside the upload area to open the iPhone file picker.
This tested route uses Workers static upload. The Continue to Pages link leads to a different workflow.
3. Open the extracted folder
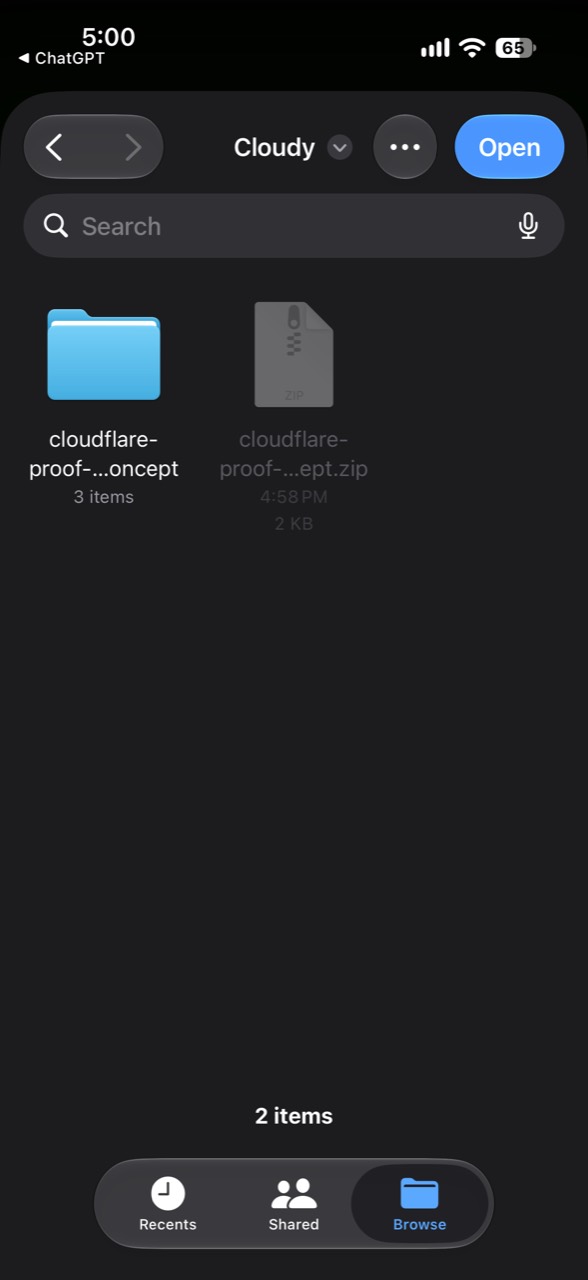
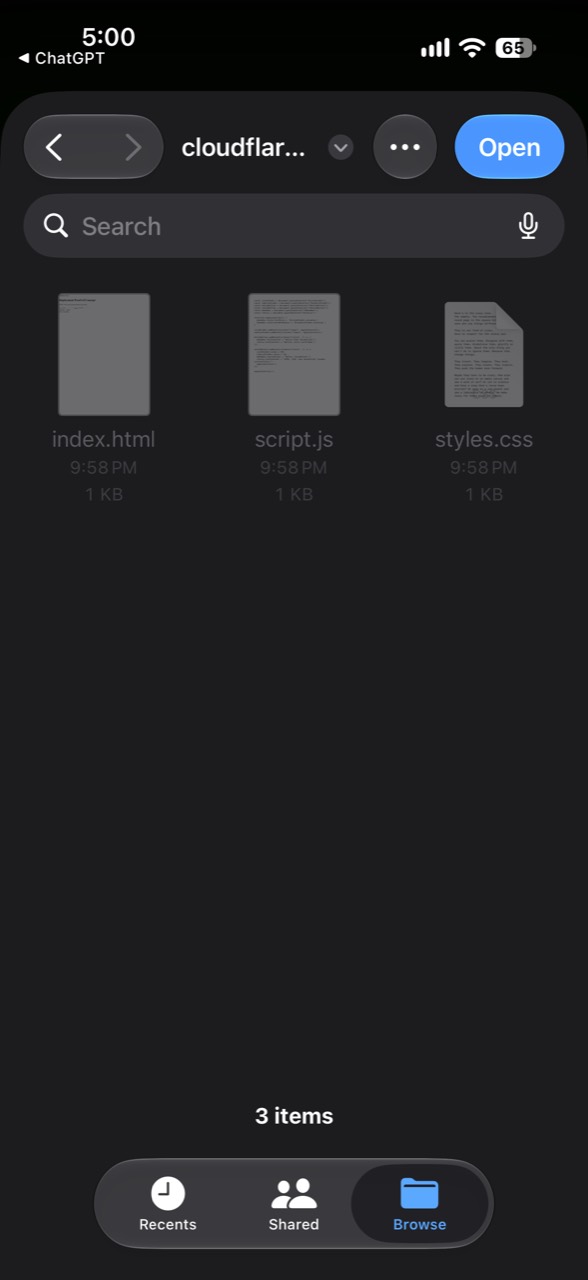
In the file picker, go to where you saved the download. Open the extracted folder beside the ZIP. Inside it, confirm that you can see index.html alongside the website's other files, then tap Open in the upper-right corner to select that folder.
In this example, the folder contains index.html, script.js, and styles.css. Your filenames can differ, but index.html must be at the folder root. If another folder is the only thing inside, open that inner folder until you reach the actual website files.
4. Review the uploaded files
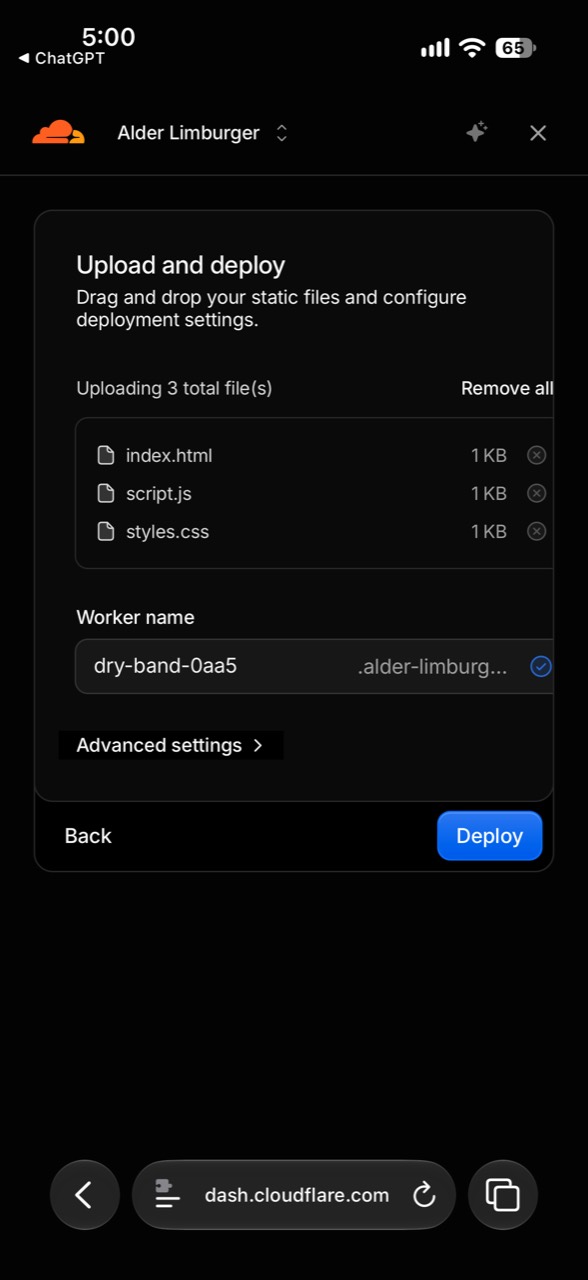
Back in Safari, check the file list. The example lists all three files directly: index.html, script.js, and styles.css. If the list is empty or shows the wrong folder's contents, correct the selection before deploying.
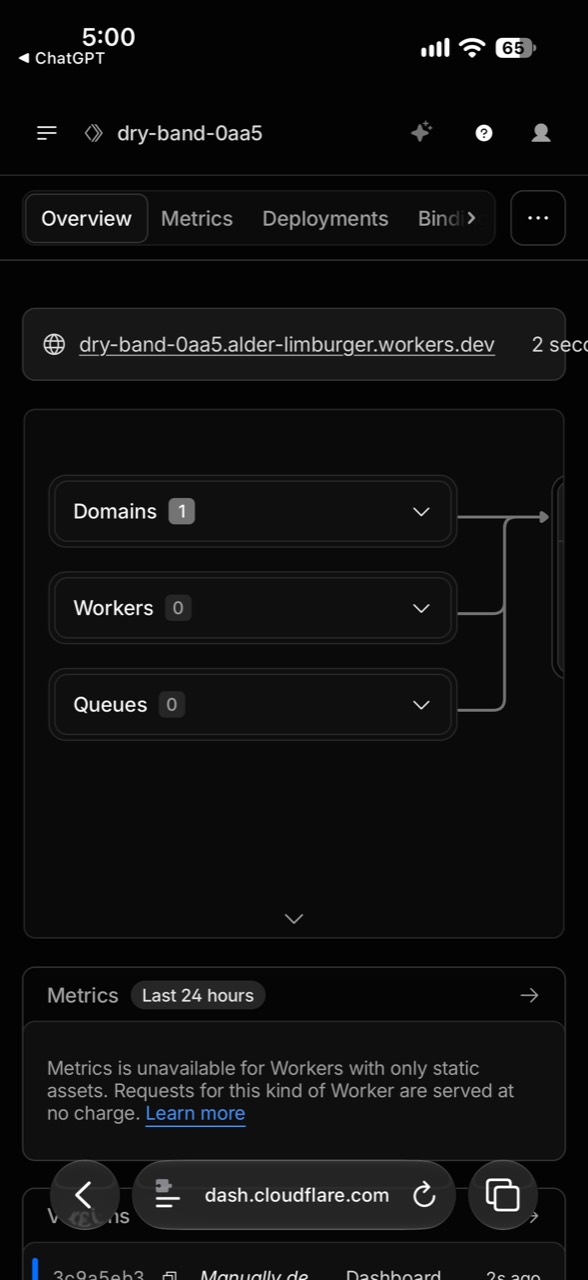
Cloudflare also supplies a Worker name. The tested example used dry-band-0aa5; your generated name will probably differ. Keep the supplied name or enter one you want to use.
5. Deploy the website
Tap Deploy. For this static test, the uploaded folder was enough: no terminal, editor, Git connection, Wrangler command, server-side runtime code, or build configuration was needed. Leave Advanced settings alone for this example.
Wait for Cloudflare to finish and show the application's overview. The screenshot below shows the final upload screen before tapping Deploy.
6. Open the live address
On the application's Overview, tap the address ending in workers.dev. That opens the deployed website. Its address follows the pattern https://your-worker-name.your-subdomain.workers.dev. Save this address so you can return to it and share your result. Open it in a private Safari tab while signed out to confirm someone else can reach it too.
A dashboard entry is only the deployment milestone. Open the website itself before deciding the build works.
7. Check the page's controls
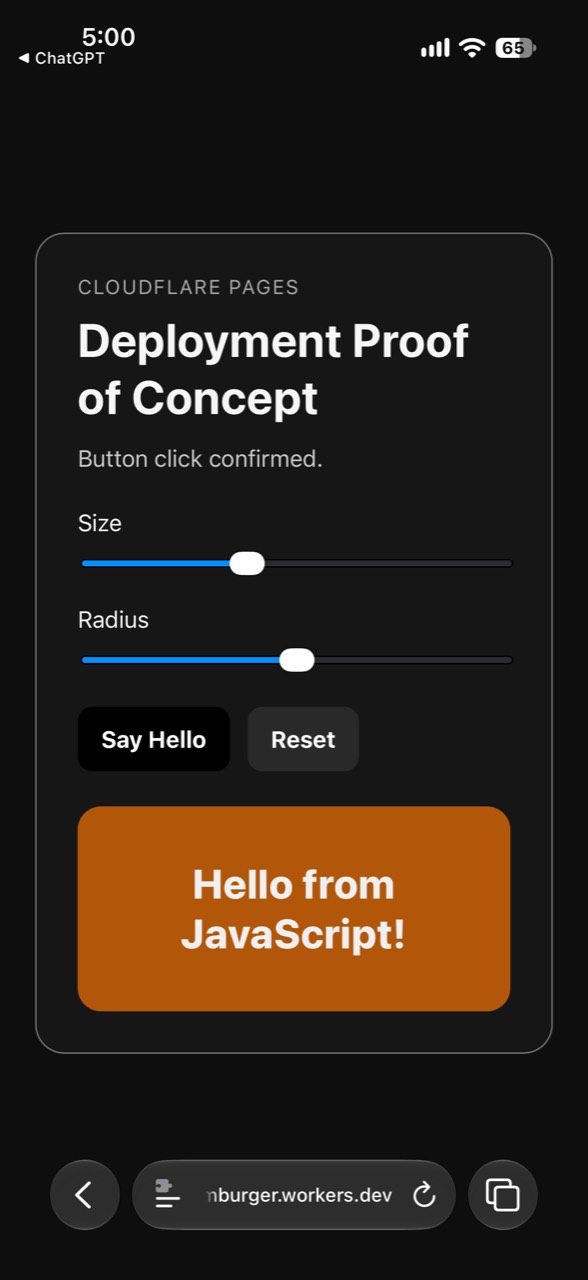
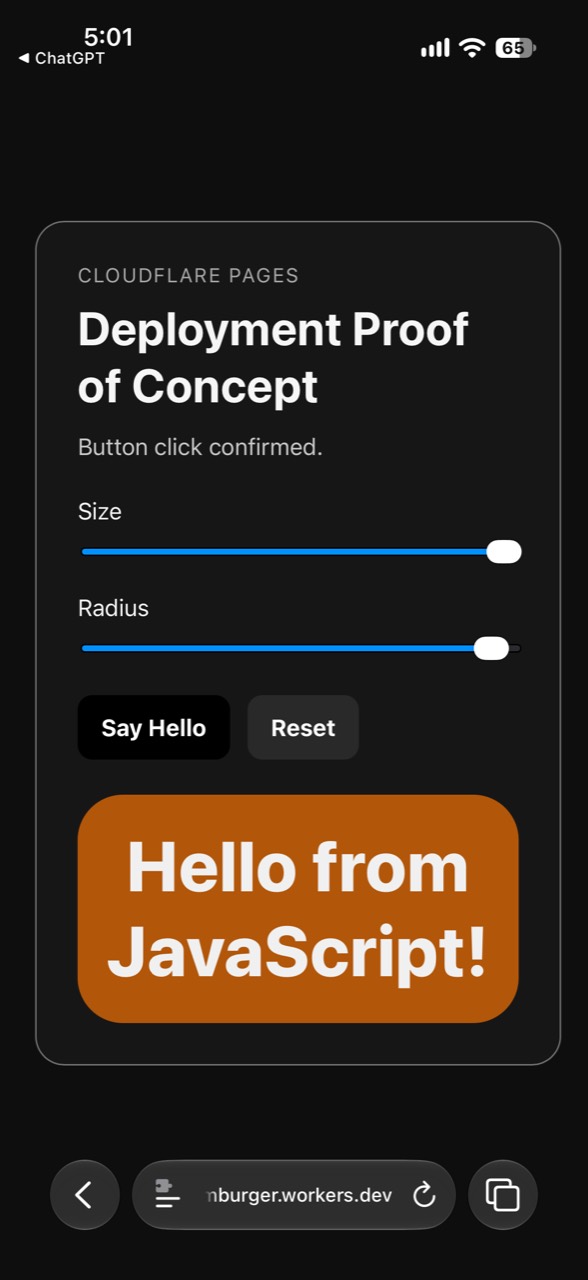
Try the main actions at the live address. In the tested example, Say Hello displayed Hello from JavaScript! and the status Button click confirmed. Moving the Size and Radius sliders changed the greeting's text size and the orange panel's rounded corners. Try Reset and confirm that it restores the starting state your agent described.
The two screenshots show the hello response and then the changed slider positions and appearance. Devin reported testing the controls on the deployed page. If your page looks different, check its controls against the behavior you asked your agent to build.
The example page's small heading says Cloudflare Pages, but its actual deployment in these screenshots used the Workers static-upload route described here.
Keep the result
The test served the HTML, external CSS, and external JavaScript as a working application. Say Hello changed the content, Reset restored the initial state, and both sliders changed the live interface. This established more than a successful file upload.
Keep the live address and the original website files with your Phase 1 progress. If a control fails, tell your agent what you tapped, what you expected, and what happened. Have it correct the files, upload the revised folder, and check the live result again.
When to use this route
Use this for a tiny static project, a quick experiment, or learning how website files become a public app when you only have your phone. It is optional Phase 1 extra credit. Finish Phase 1 without deploying if you prefer.
For larger projects, source control and a normal development environment make ongoing work easier. This upload test does not cover server-side applications or replace Phase 2's computer setup and meaningful build. Cloudflare's static assets documentation (opens in a new tab) explains how it serves website files.